Tuesday, 13 August 2013

Work Diary

Work Diary
Sequencing
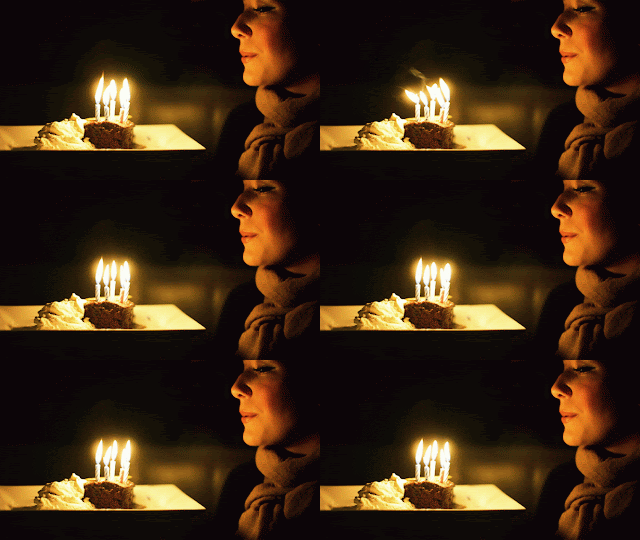
     I did not particularly enjoy this shoot as I did not know what sequencing consisted of in photography therefore I felt slightly unprepared for the shoot and because of this I don’t think the outcome was as good as it could have been. All the sequences I attempted to capture were all very simple and boring as I didn’t have that many ideas. However I feel like I have gained a lot from this shoot as before I didn’t even know what sequencing photography was but know I know what it is, how to shoot it and how to set It out for printing on Photoshop.


This is the final image I came out with I think it could be improved if I used a tripod as the individual photos are slightly wonky, I think it would also look slightly better if I did the walking steps even more gradual and had more of them or perhaps if the sequence showed more of a story.


Idea development:
The main thing I would need to do if I was to develop my sequencing would definitely be to use a tripod whilst doing it as I think the pictures would look more professional. I also want to develop my sequences further by trying to do one where you layer the pictures on top of each other and use the layer mask and rub it out so sequences is all together on one back ground 

Depth of field technique

Three main factors that can be used to control depth-of-field1 The aperture. 
There's a simple, direct relationship between aperture and depth-of-field - the smaller the aperture, the more extensive the depth-of-field. 
If, however, you want to concentrate attention on just one part of the scene, and throw the rest out-of-focus, you should select a large aperture. Exactly how large this can be depends on the maximum aperture of the lens you're using

2 The focal length of the lens.Attach a wide-angle lens and you'll benefit from extensive depth-of-field, which makes it easy to keep everything in focus. The wider the angle-of-view, the greater the depth-of-field. The longer the focal length, the more restricted the zone of sharpness is.

3 The Camera-to-Subject Distance
For various technical reasons, the closer you get to the subject the more limited the depth becomes. In fact, when shooting close-up subjects it can extend to just a few millimeters in front of and behind the subject.


Animation technique

Animation technique
1STEP :  Firstly you have to open photoshop then find 'Window' at the top and from there... Window>Animation>Tick
2STEP 2:  Then you must upload all the photos you have taken for your animation that you want to use. they have to be the same size though. (you can check/correct this by image>image size
3STEP 3:   After you have done this you must now drag on the images on top of eachtother (I personally find it easier to put them on top in the order you want them to appear in)
4STEP 4:The number of frames you have match the number of layers therefore you must make the number of frames you want in the animation bar below however you can add frames as you go.
5STEP 5: When you have your frames you need to make sure its only the layer you want that is visible on this particualr layer,  you have to click the eye icon  which is next to the seperate layers to hide the visibility of otther frames 
6STEP 6: Change the amount of time you want each frame to show on the animation bar
7STEP 7: There is an option to change it to a looping gif this means that it will run continuously as a 'loop' fashion as opposed to playing through once then stopping. 
8STEP 8:  You must go through the following steps to save your animation. File>‘Save for Web & Devices’, save as GIF

9STEP 9: Finally, to put on internet, upload to photobucket and get the html code


Friday, 9 August 2013

Image bank

Depth of Field


The pictures in this image bank show minimum depth of field, These pictures all show the object of the picture very clearly with the background quite drastically blurred out so the main focus is on the object. The third picture in the image bank has particularly inspired me as it shows the comparison of doing minimum depth of field and clearly shows how much more effective it can be using it. In my pictures I am going to take maximum and minimum depth of field pictures so I can see the clear comparison I also think the green background used in the second and third pictures look appealing so I might try and do my pictures against green too. 


Image bank

Animation


The common thing with all of these animations is that they are on a continuous loop, I think this works well in all of the animations therefore this has inspired me too to make sure I make my animation on a loop. The animations I have in this image bank are all of quite simple motions (excluding the first one), so I think when I make my animation I will try and fine a simple action to capture to, to ensure I get an effective animation. From looking at animations in the process of making this image bank I presume that a lot of separate shots were taken to form the 'smoothness' of the action as none of them show any 'jerkiness' or movement so I too will try and do this, as well as trying to keep the camera as still as possible (unless I can use a tripod, then this convenience is eliminated) 

Image Bank

Sequencing 
Here are some examples of other sequences in photography, The first picture in this image bank is slightly different compared to the others as this sequence is like a scene split up into three separate pictures rather than actions being shown, for example in the two skate boarding             pictures. This picture could inspire me to do something similar in my own work but as I am trying to show the technique of sequencing I think it would be a better idea to stick to something more obvious like the second picture of the girl in my image bank.
The last picture in this image bank has taught me that if I keep the              camera in the same place/position I will get a better looking sequence as         it shows the movement easier as the camera is not moving with it. The last picture in this image bank is slightly different to the sequence I will be doing as it has all the pictures layered on top of each other however I could try to do something like this in my project.